How to Make a Contact Form with Nodemailer

If you have a portfolio without a contact form, I’ll suggest you work on it or ask your developer to work on it. I didn’t realize how easy it is to make a functional contact form until I recently created one here.
Tools used: Next.js and Nodemailer
There might be more to these two, as I already have an official mail hosted on Zoho, so I didn’t have much strength battling with Gmail security issues with authentication on Nodemailer, though this post will help.
Creating a contact form is straightforward, but there are certain pain points, especially when dealing with Nodemailer’s authentication quirks. For instance, when using Gmail with Nodemailer, you’ll face security issues, and even though I’m using Zoho for my own mail, it still takes a little work to make it work smoothly.
If you’re tired of fiddling with setup and security issues like these, you might want to consider an alternative like Notify, which works out of the box and offers a hassle-free way to handle contact form submissions.
That said, let’s get started.
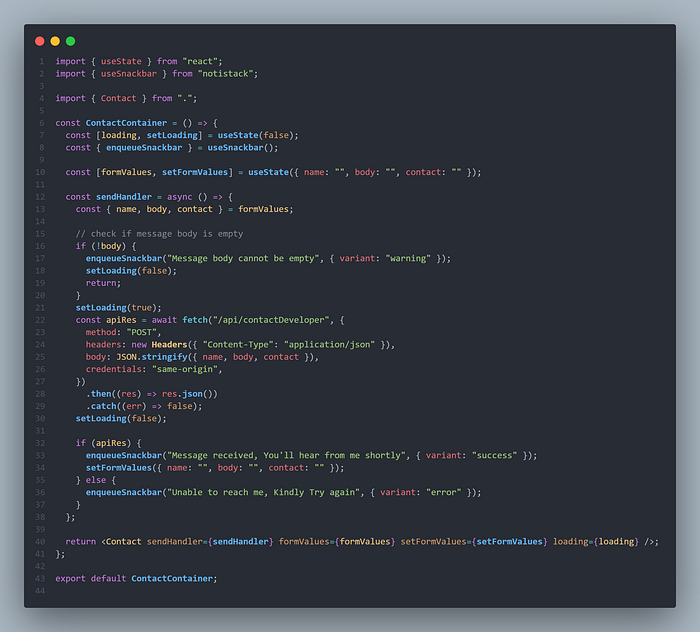
I tend to follow the container pattern, which in React, ensures the separation of the data fetching logic, managing state from the presentational part. The presentational part has got a dumb name, dumb component. So in the ContactContainer.jsx, we hold states/values for our form and a handler to send our form to an API.
If you notice, all form values are stored in a single formValues object here, just another way to show you how to update objects in states. If you watch carefully, you’ll see I used Notistack, which is a Snackbar library that makes it extremely easy to display notifications on your web apps. It is highly customizable and enables you to stack snackbars/toasts on top of one another.
I also have a loading state to prevent duplicate messages, i.e. once the send button is clicked, until the execution end of this handler, the button is disabled as a lot of users like me will keep clicking if I don’t get an immediate response. I also used the fetch API to communicate with the API/pages, you can read more on fetch here.
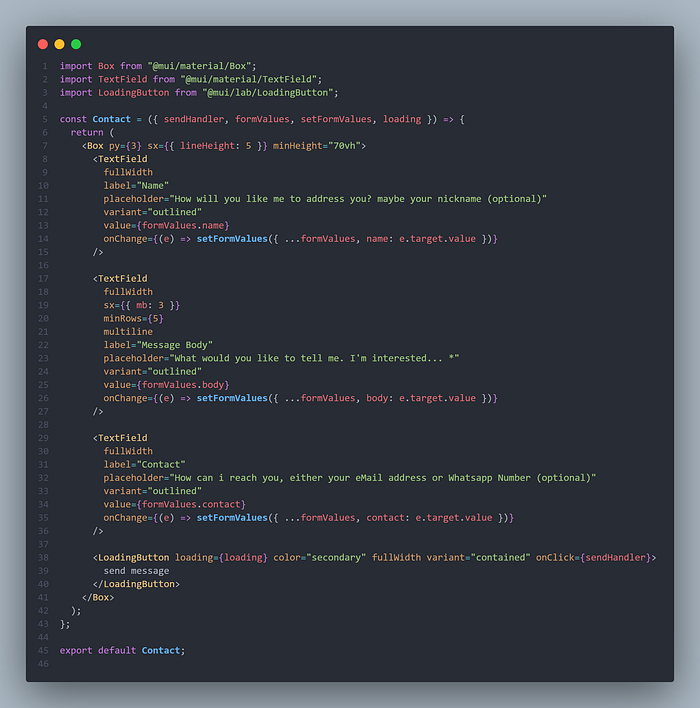
It would be overkill to install a package like axios for a simple function like this. The Contact component is quite explanatory as I used very descriptive names there. I forgot to mention earlier, that I am using Material-UI, but feel free to use any UI library you’re familiar with, it doesn’t affect the outcome of the function just the UI.
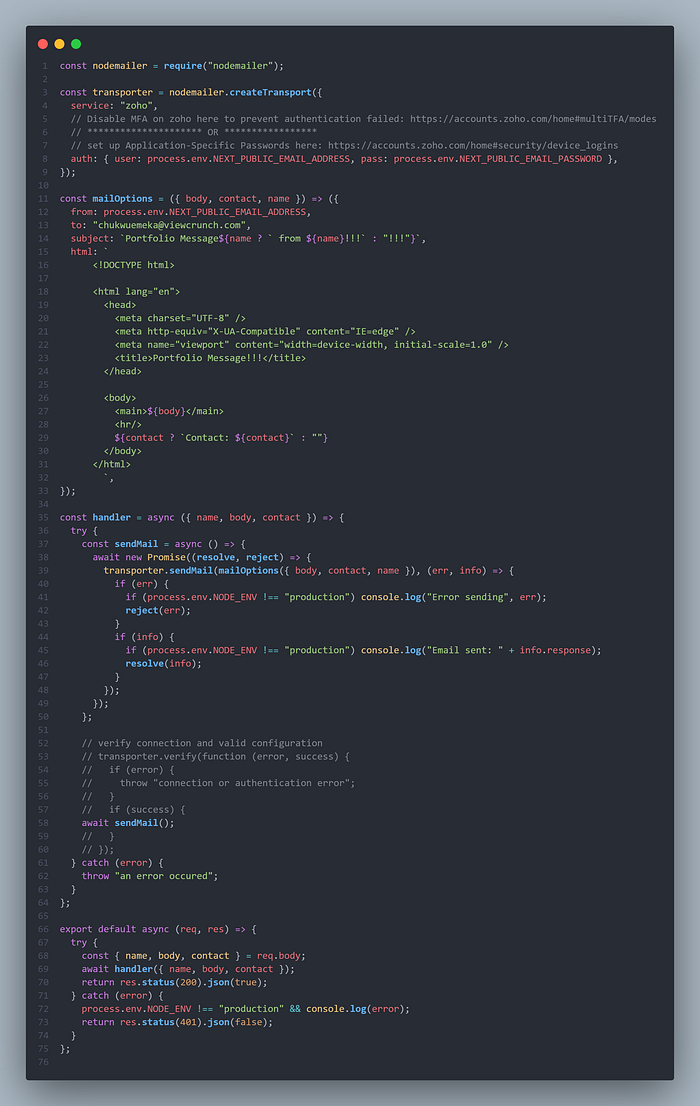
In this section, I tried to narrow down what each function does to ensure readability and maintainability.
On line 68, first, we receive the form object containing the data in req.body by destructuring it. Now you create a transporter on Line 3, which is going to be an object that is able to send mail. The service I use is Zoho mail as stated earlier, you can use any other provider. The auth object in transporter holds the user and pass where user is the email address and pass is the email password, it’s a good idea to store sensitive information like username, keys and passwords in your environment variables. and make sure you don’t send your env file to any version control like GitHub, especially when it’s a public project.
In Next.js, you can create one in the root folder with the filename “.env.local”.
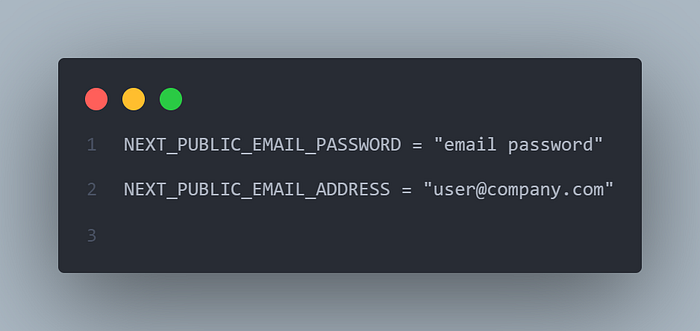
That’s for development purpose, so in your hosting platform, You should also add your variables there too.
The body of the mail can either be HTML or plain text. In this case, we used HTML, but you can also use text.
We don’t want a false hope that a visitor message was sent when in reality it wasn’t so we made transporter.sendMail an asynchronous function, i.e our button will remain disabled until it receive a message from the API stating whether our message was sent or not, in which case Notistack displays a notification based on the response. transporter.sendMail returns a callback with two parameters “err, info”, where err implies that our message was not delivered and info includes the result, the exact format depends on the transport mechanism used. You can read more on Nodemailer here.
You can also verify the connection and valid configuration in Nodemailer before initiating a send mail, but I commented this section for the sake of brevity as we should get a delivery response in transporter.sendMail.
You can access the full code here, which is actually used in my portfolio too.
Reasons why you should include a contact form in your portfolio:
It is quite easy to contact someone this way for first-timers, though for longer conversations, you should already have a link to your LinkedIn, Twitter or other platforms on your portfolio. It can also impress potential clients.
More content at PlainEnglish.io.
Sign up for our free weekly newsletter. Follow us on Twitter, LinkedIn, YouTube, and Discord.